Wiki - Documentation
Before We Start
You'll need the following:
-
A Firebase account ( Free ).
1. Configure app:
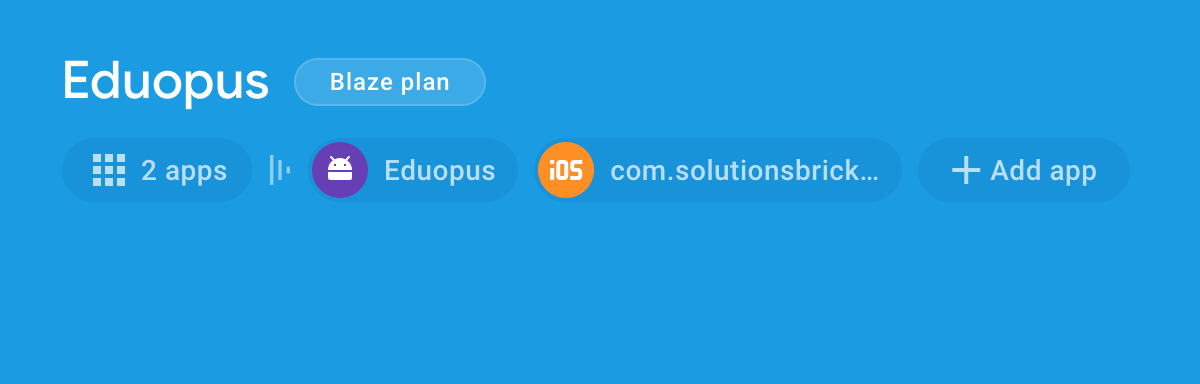
1. Add a new project or import an existing project to Firebase console.
If you already created a project before for our Eduopus Android application, don't create a new project, just start to add the app to the same project.
2. Then create a new app if no app existing or add an app to your project.
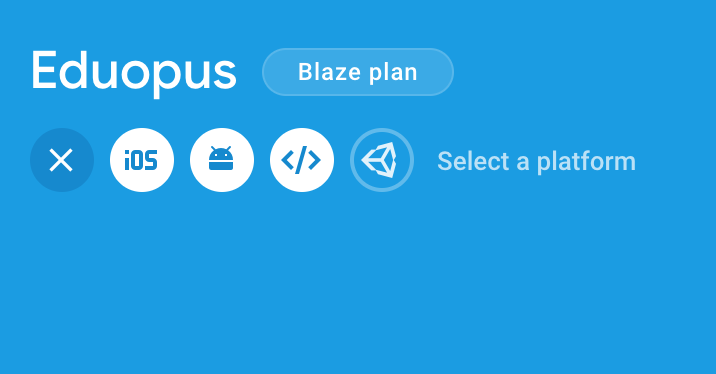
3. Then select the iOS icon as the target platform.
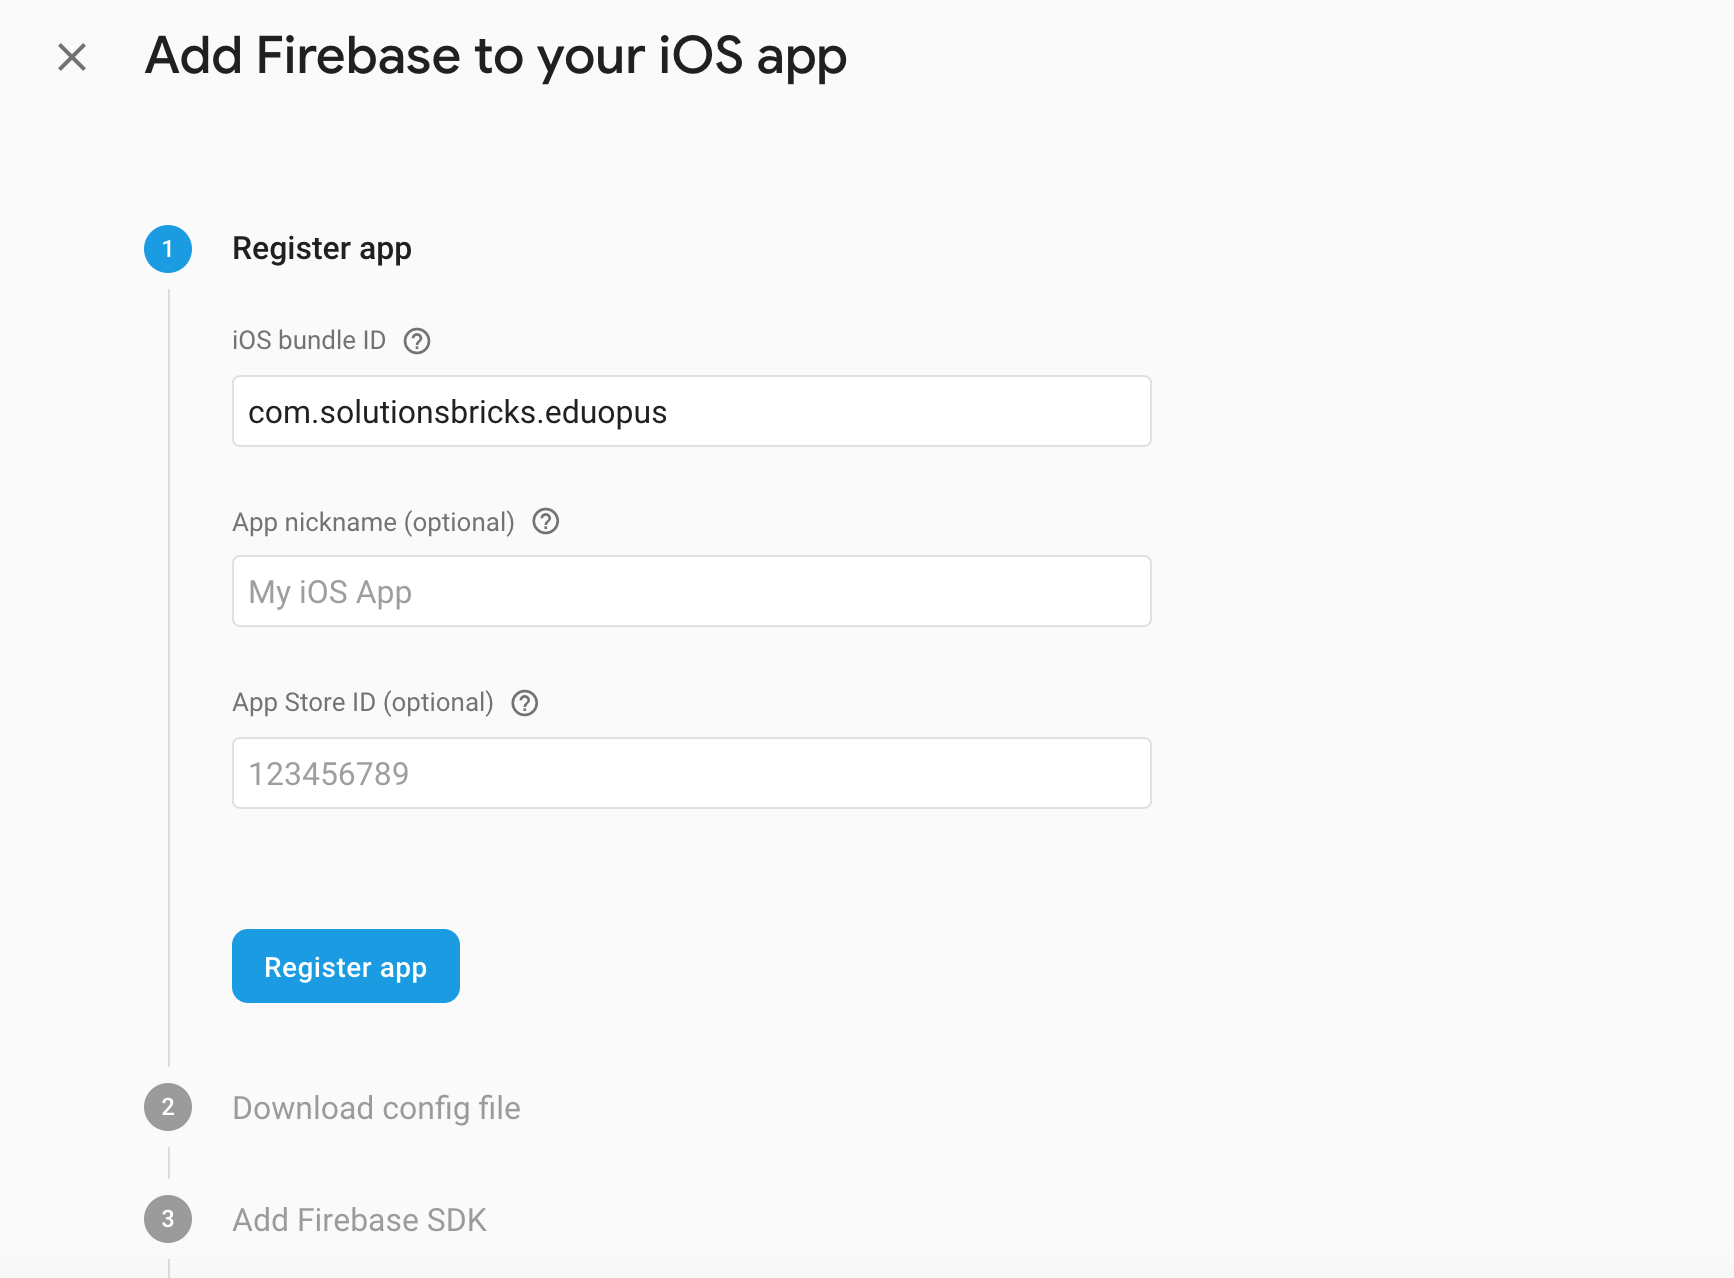
4. Write your app ( iOS Bundle id ).
The bundle id is a unique name to identify your institute app on App Store for iOS and on the Google Play for Android. Generally, the bundle id of an app is in the format domain.company.application like com.solutionsbricks.eduopus, but it's completely up to the app's developer to choose the name.
This package name must be the same as you registered on Eduopus portal.
App nickname is optional, use what you want if you want.
App Store ID certificate is left empty as not used by Eduopus.
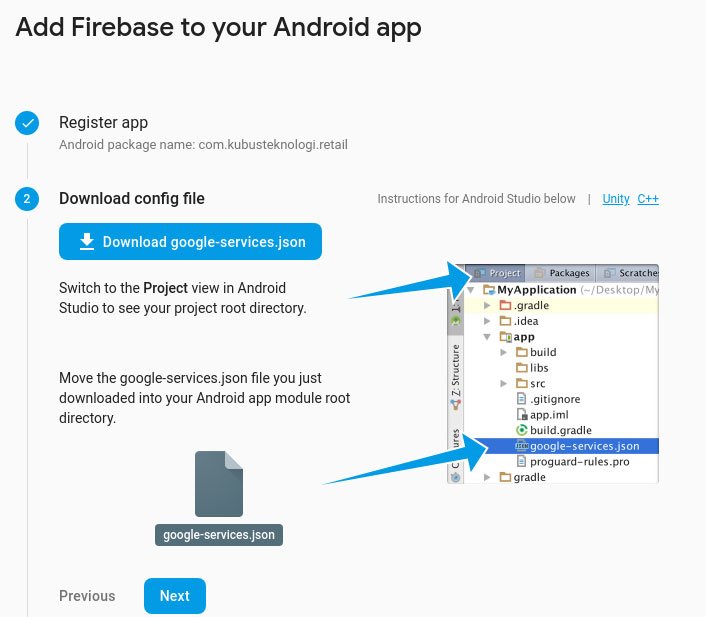
5. Download GoogleService-Info.plist file, you will need to upload it later in Eduopus console.
6. Now your app added successfully, you need to press Next on next step and skip the last step to finish this wizard.
2. Connect Firebase to Eduopus institute:
If you already made these steps on Android application before on the same project, don't need to repeat them again.
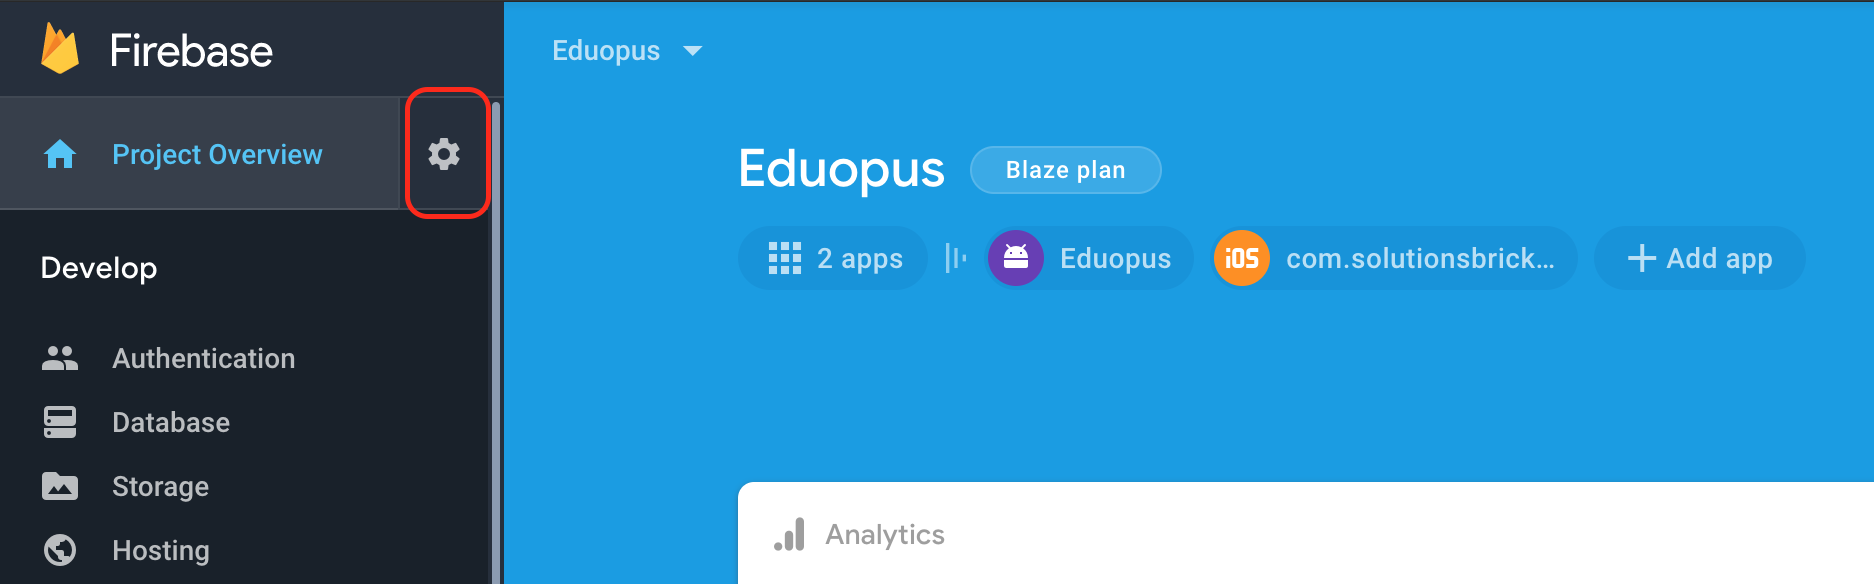
1. Go to Firebase your Firebase account again, then select the project you have created.
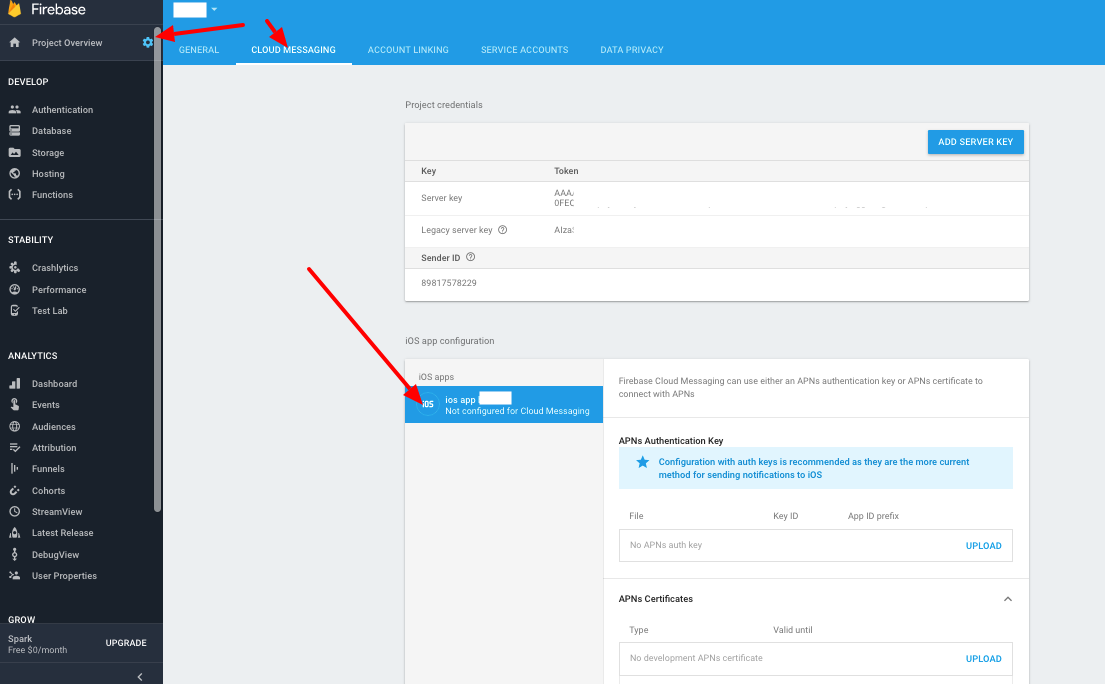
2. Click on the Settings icon on the top-left corner as on below image.
3. Select Cloud Messaging from the top tab bar as on the below image.
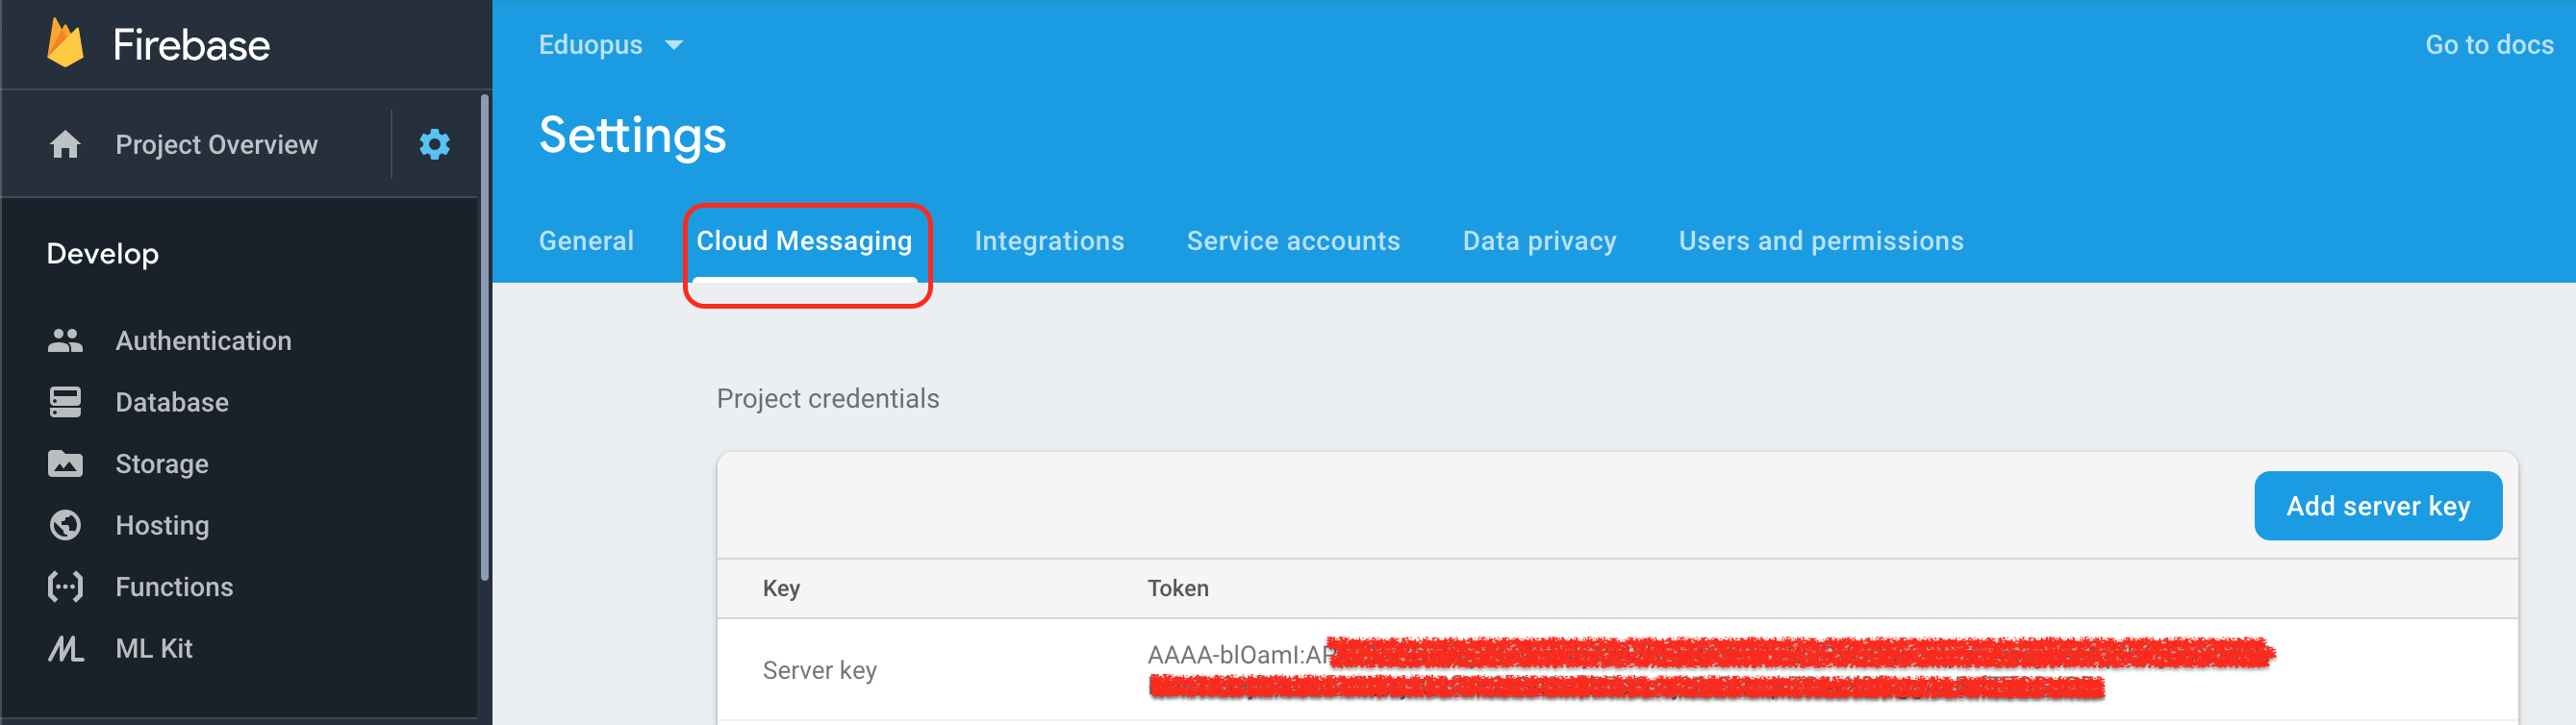
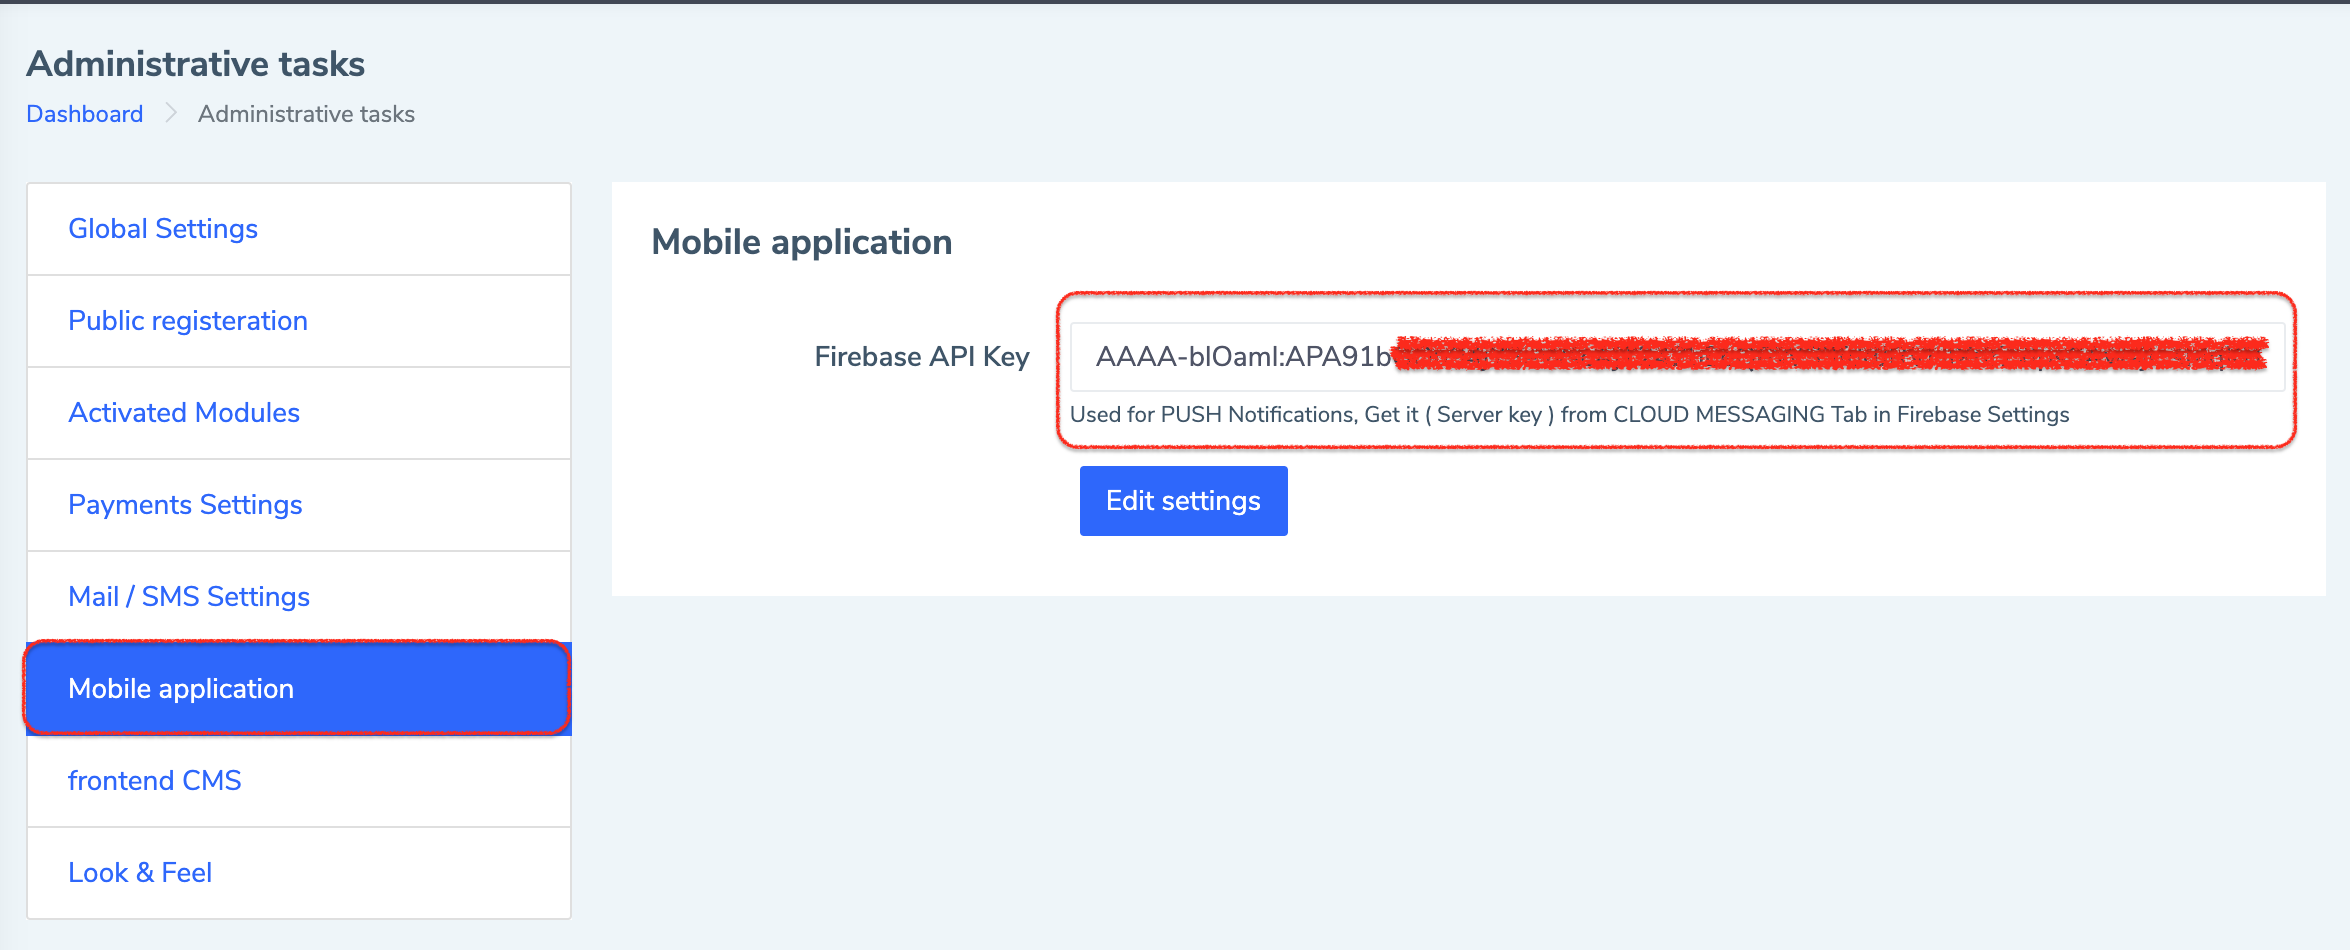
4. Copy Server key to put it into Eduopus.
5. Open your institute portal.
6. After login, go to Administrative tasks on top of the page.
7. Select General Settings.
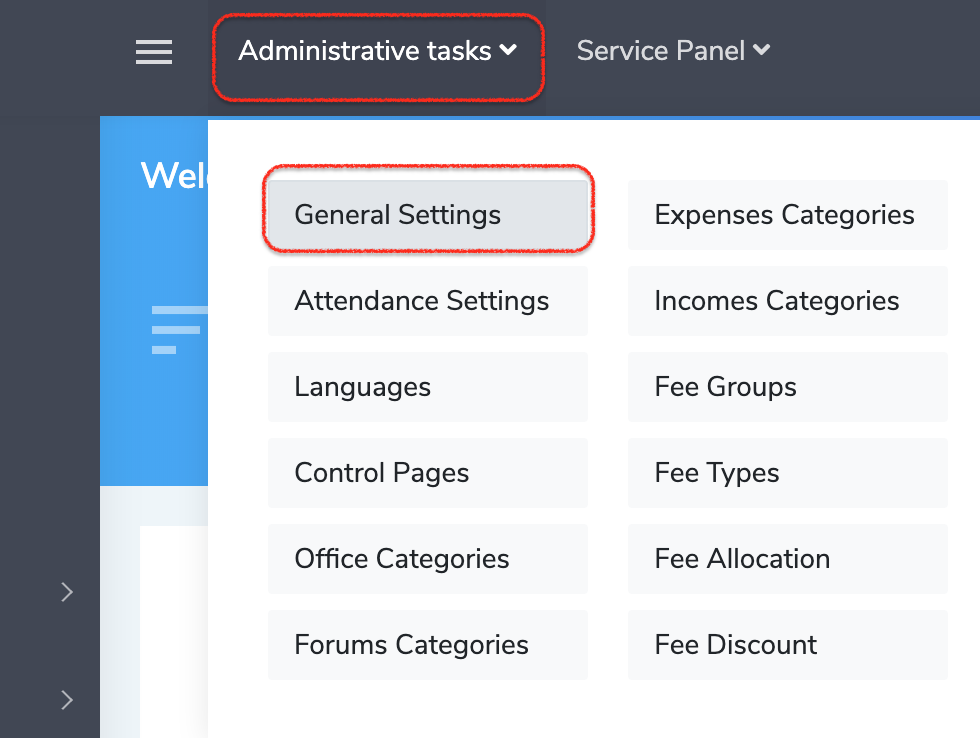
8. Select Mobile application from the left menu.
9. Paste Server key into Firebase API Key field.
3. Add p12 certificate to your Firebase:
A P12 (certificate + private key), a .p12 file contains the certificate used for multiple purposes, here we use it to connect Apple with Firebase.
This p12 file is different from p12 file that generated while creating application using Eduopus app builder, this p12 file generated from (CER) certificate its type is (Apple Push Services) but p12 that used while creating iOS application on App Store generated from (CER) certificate its type called (ios distribution) certificate, this (CER) and (p12) generated with different way than another (CER) and (p12) for creating application.
3.1: Create a CER certificate for Push Notification services:
First, make sure that you have created the application on App Store first, go back on documentation to check how to create the application on App Store.When you create application and app id successfully on App Store, go on following :
1. Go to your App Store portal
2. Select Certificate, IDs & Profiles from left panel.
3. Select identifiers
4. Select your institute application.
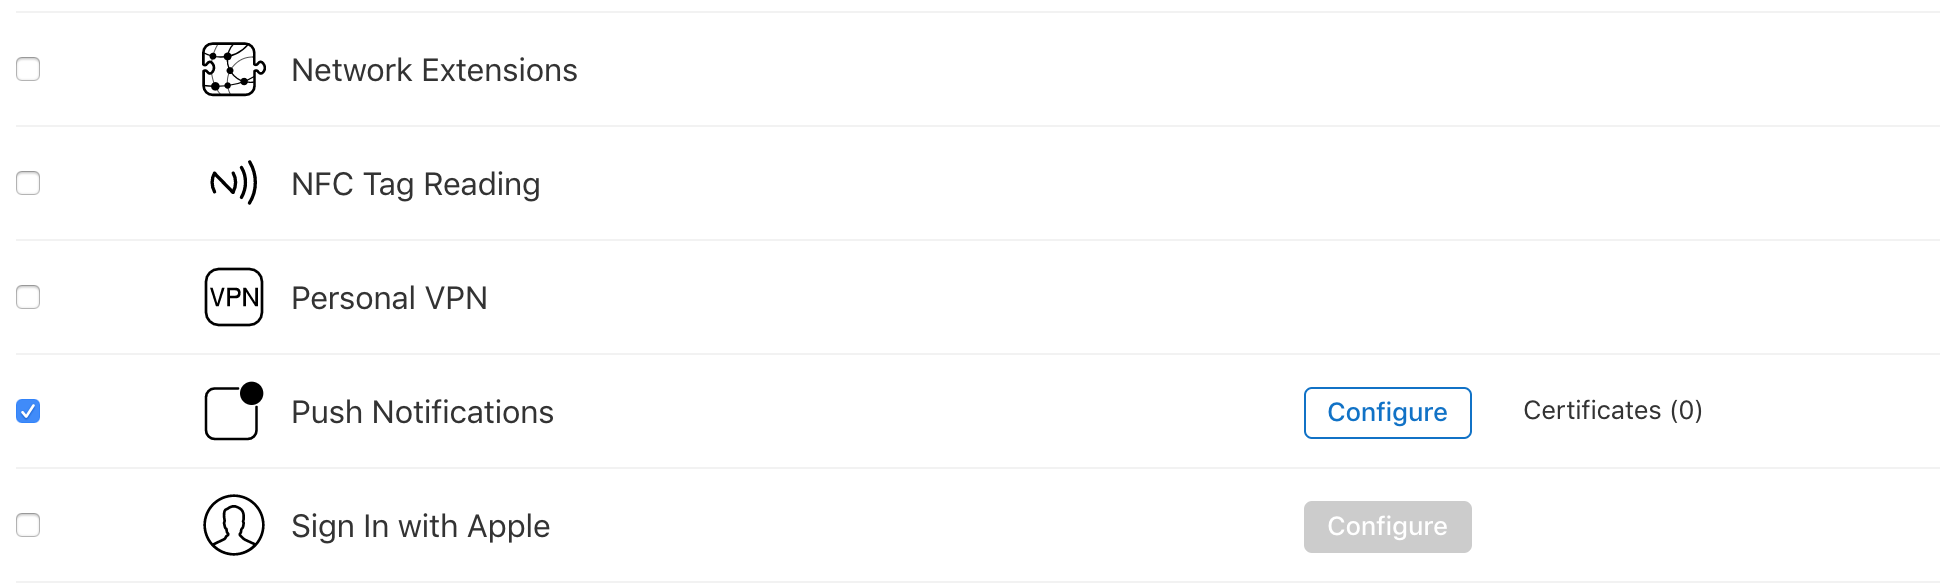
5. Go below on Capabilities, we have to see Push Notifications enabled and need to be configured, If disabled, just enable it.
6. Click on the Configure button.
7. Click Create Certificate on Production SSL Certificate
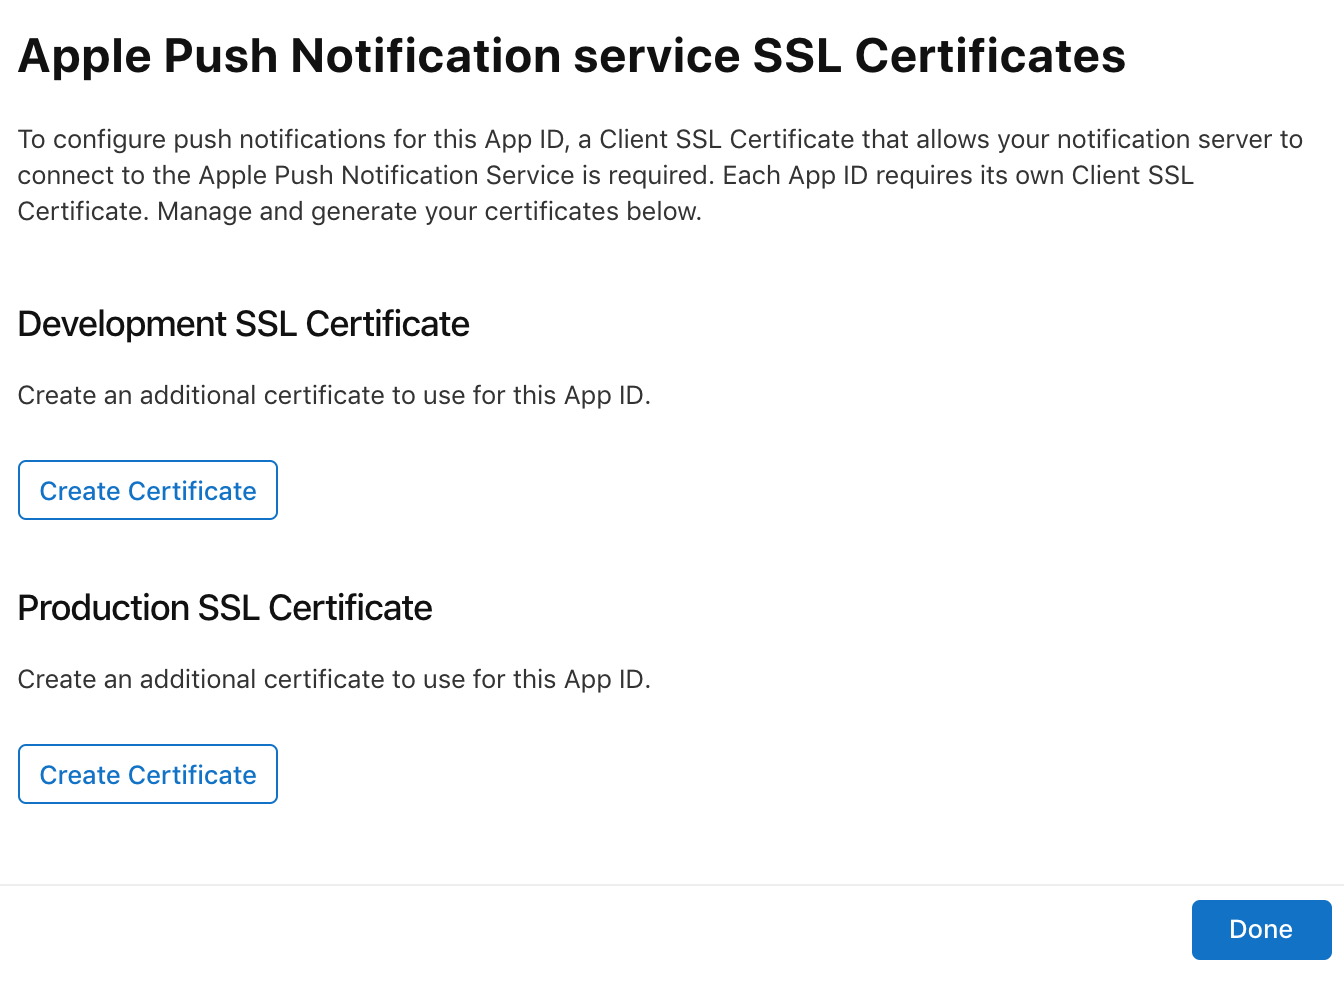
8. The portal then shows an explanation of how to generate a CSR using Keychain Access, make sure that certificate name is Apple Push Notification service. To follow the instructions, you need to open the Keychain Access app on your Mac. If you don’t know where it is, search for it using Spotlight.

If you don't have a Mac machine, open a ticket to our support team to send you one of our CSR certificates to use it.
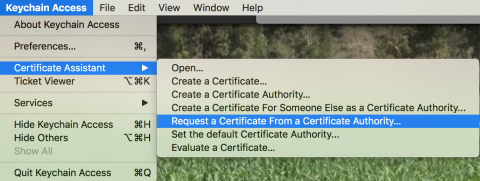
9. Once the program is open, choose Keychain Access\Certificate Assistant\Request a Certificate From a Certificate Authority…:
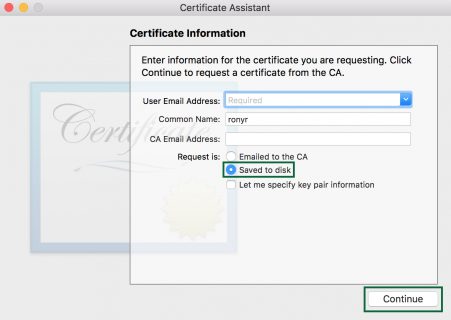
10. In the Certificate Assistant window, fill in your email address and name, choose Saved to disk and click Continue:
11. Save the file somewhere on your Mac. That’s your CSR created, now to generate that certificate.
12. Go back to the Developer Center in your browser, click Choose File…, locate the CSR file you just created and select it, then click Continue.
13. Click on Continue, then Download CER file.
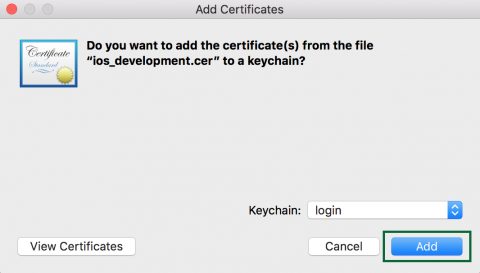
You will now see a screen that says your certificate is ready ( Apple Push Services CER certificate ). Click Download, and double-click the certificate file to install it in the keychain.
Click Add in the Keychain Access dialog to complete the installation:
3.2: Create a p12 certificate:
1. On your Mac, launch Keychain Access, select the certificate entry you added on the previous section and right-click on it to select "Export."
All certificates you have installed will be in the "login" keychain, under the category "My Certificates".
It will have the name "Apple Push Services <firstname> <lastname>" and will expire one year from today's date.
Make sure to right-click the main certificate itself not its child item, and choose Export

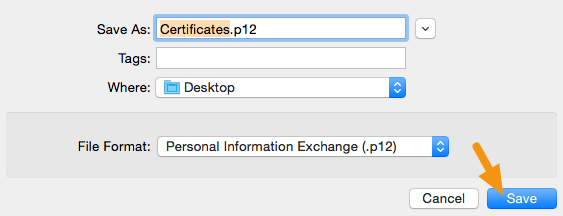
2. In the window that appears, make sure the File Format is set to "Personal Information Exchange (.p12)" and click on "Save" to save it to your machine.
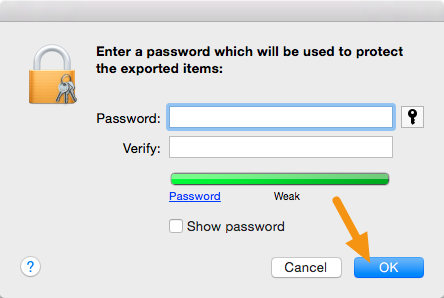
3. When asked for a password, write a password and save it in your brain as you will write it while uploading this certificate to Firebase on next section "Ok."
3. Add p12 certificate to Firebase:
1. Go to your Firebase project through Firebase console.2. in the Project Overview area, go to the Cloud Messaging part and in the iOS app Configuration, and proceed to configure the app.
3. Once there in the part of APNs Certificates you must upload the Apple APNs Certificate.
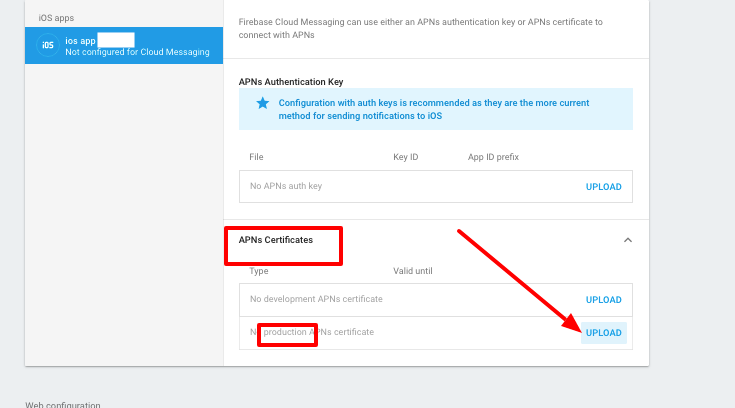
3. Then, once the iOS app has been selected, you need to upload the production .p12 file that you exported from your mac previously.
4. Write p12 password, press upload.