Wiki - Documentation
To submit Eduopus iOS application to the iTunes Store/App Store you need to create an App ID ( Bundle Identifier ) to publish your application to it using iTunes Connect.
App ID vs Bundle ID
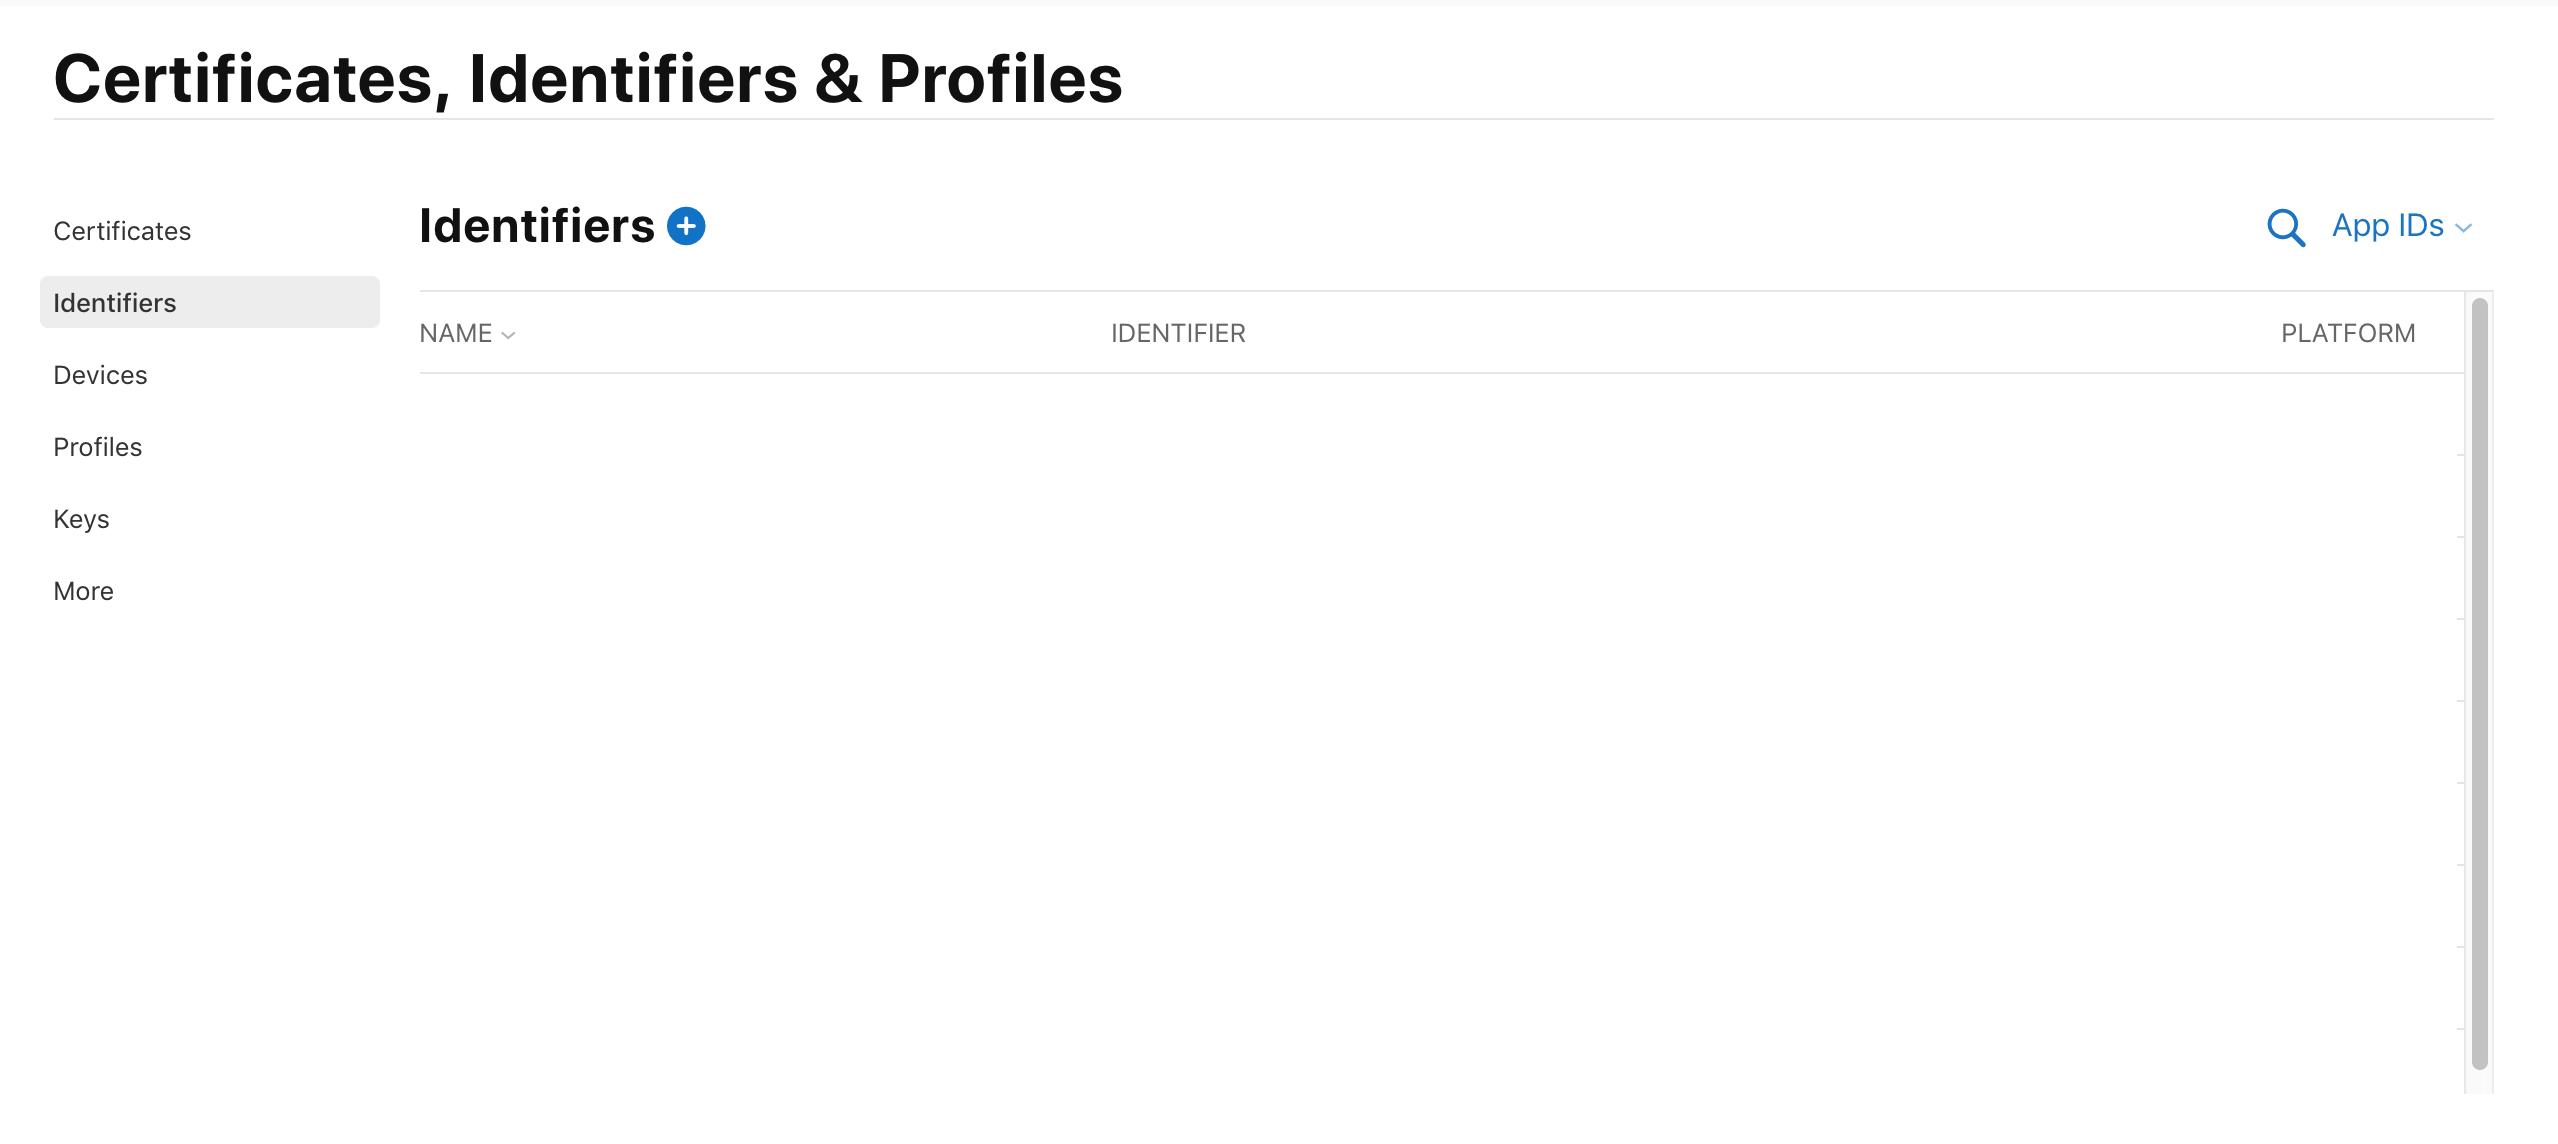
2. Select Identifiers from the left panel.
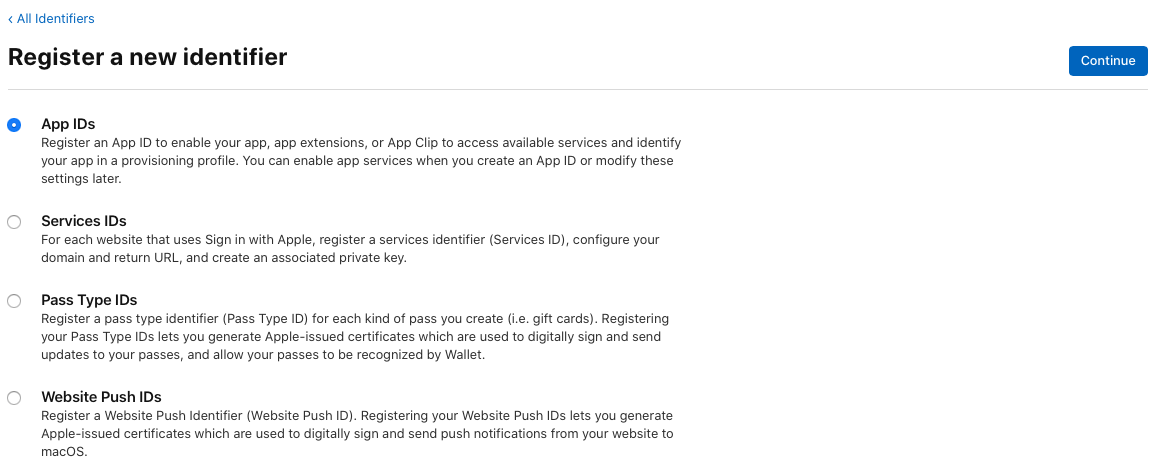
3. Click on the + in the upper:
4. Select App IDs from the list, then press continue
5. Select type to: App, then press continue

6. Select Platform as iOS, write a description about your app and write your app bundle id.
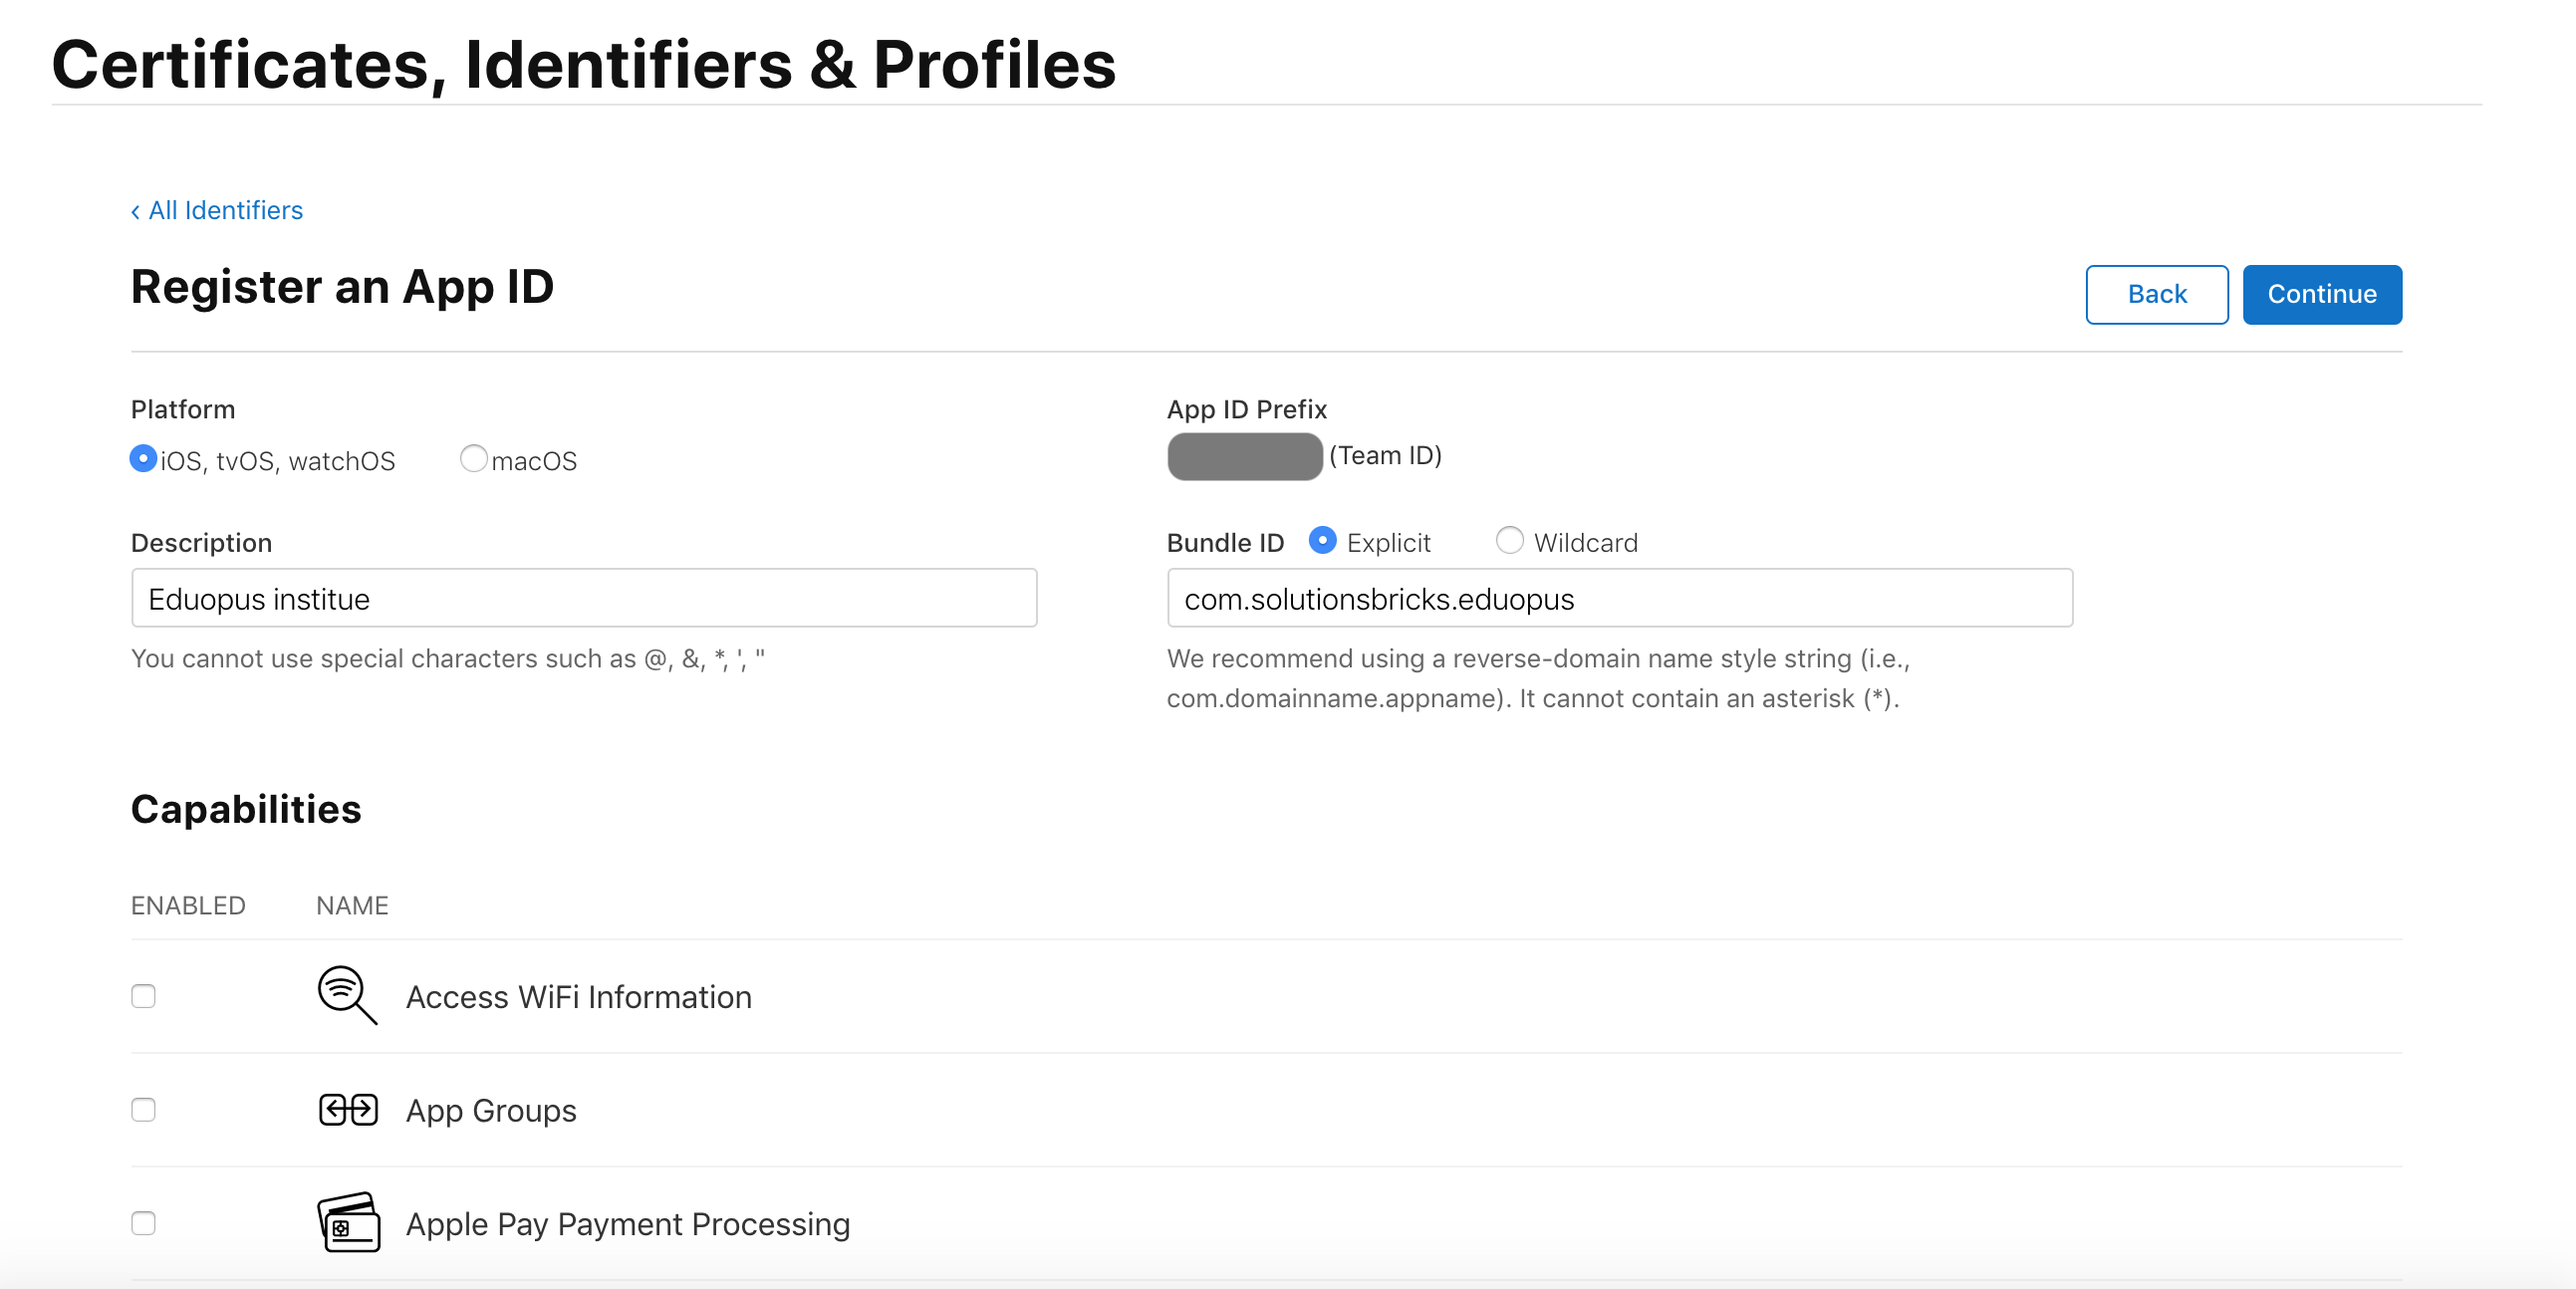
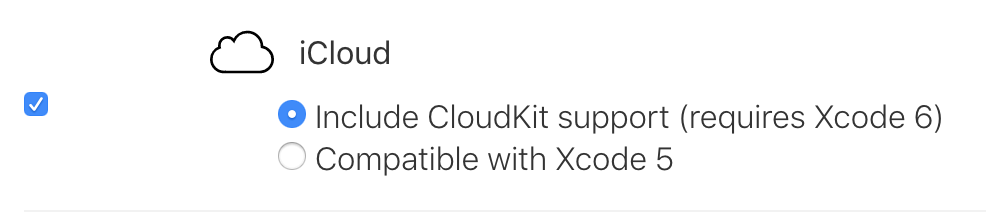
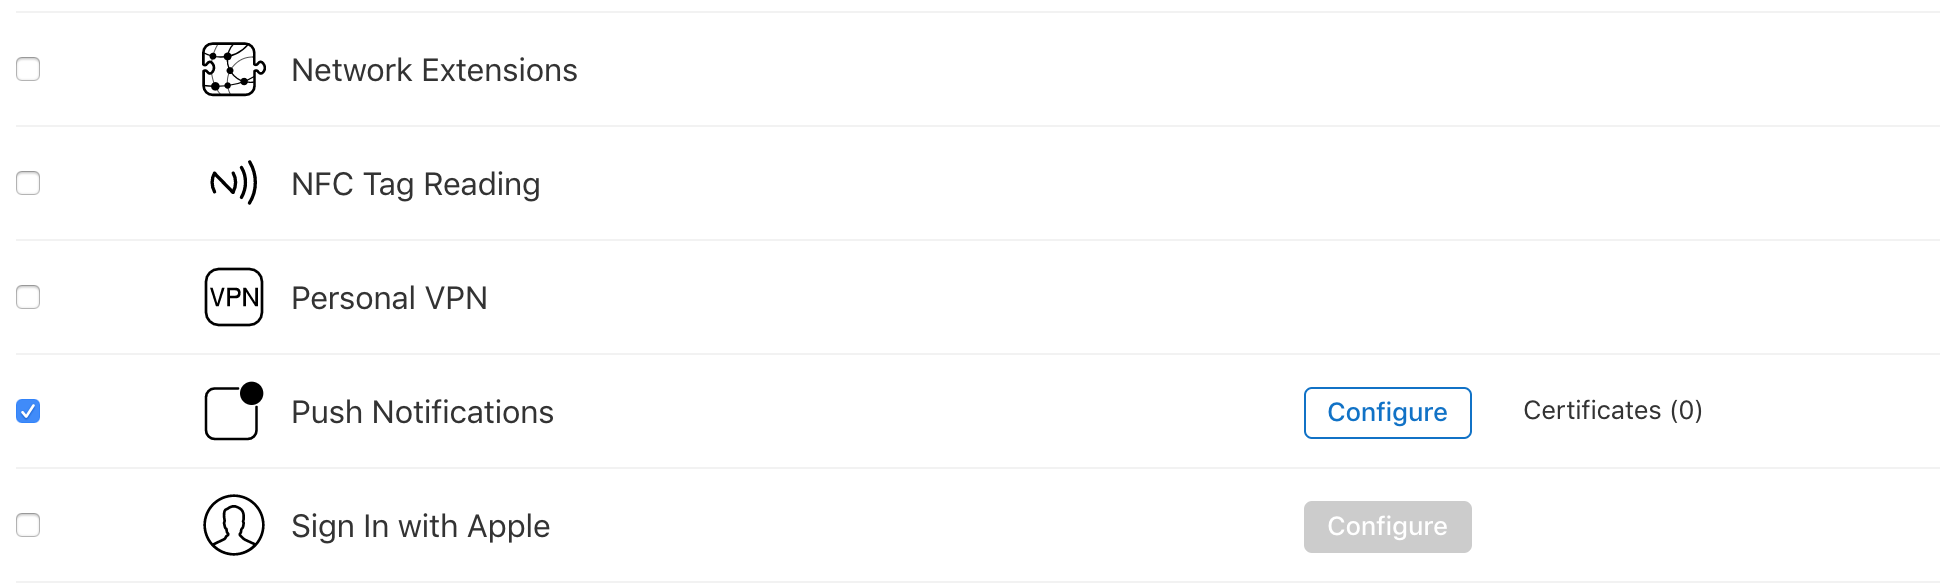
7. Go below on capabilities, enable iCloud capability, select Include CloudKit support (requires Xcode 6), we will configure it on iCloud section.
8. Enable Push Notifications capability which allows you to send notifications to your app users from your web portal, we will configure it on Push Notifications section.
9. Click on Continue on upper of page, then click on Register.
App ID vs Bundle ID
- App ID: An App ID is a string used to identify app from a single development team. The string consists of two parts, the Team ID and the bundle ID separated by a period (.). The Team ID is supplied by Apple, while the bundle ID is supplied by the developer.
- Bundle ID: A Bundle ID is a tool Apple uses to identify individual apps. this bundle id like package name on Android apps. Examle: com.solutionsbricks.eduopus
You can change your Bundle ID on iTunes Connect until your app has been approved by Apple and is available on the App Store. Once your app is approved and available for download on the Apple App Store, your Bundle ID cannot be changed.
If you are using our Android application also, It's highly recommended that the iOS application bundle id to be the same as the package name of Android application.
Generally, the package name of an app is in the format domain.company.application like com.solutionsbricks.eduopus, but it's completely up to the app's developer to choose the name.
Start creating iOS application App ID
1. Go to your App Store portal2. Select Identifiers from the left panel.
3. Click on the + in the upper:
4. Select App IDs from the list, then press continue
5. Select type to: App, then press continue
6. Select Platform as iOS, write a description about your app and write your app bundle id.
7. Go below on capabilities, enable iCloud capability, select Include CloudKit support (requires Xcode 6), we will configure it on iCloud section.
8. Enable Push Notifications capability which allows you to send notifications to your app users from your web portal, we will configure it on Push Notifications section.
9. Click on Continue on upper of page, then click on Register.